
An instructor cannot be given a custom report that shows every user in a course by giving the instructor access to the report. Custom reports are built in the context of the system, and the users a report shows are based on the system-level role of the person viewing it. System Administrators and System Coordinators can see all users in the system. Supervisors can see only the people in their team, as described in TeamAlign™. Adding conditions and filters to a report, such as limiting it to specific courses, changes which courses the report lists but does not change this scope.
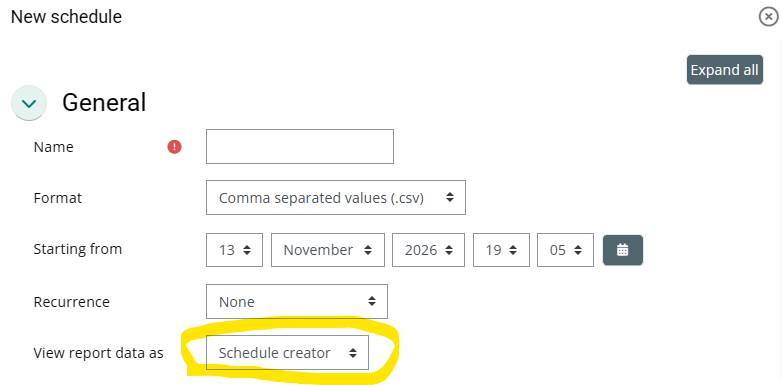
Administrators may still want to build custom reports for instructors that deviate from the standard reports the instructors have access to. The way to do this is to email the custom report to the instructor using a schedule. When a schedule is created, the "View report data as" option lets the recipient receive the data as the schedule creator would see it. The instructor then receives the report as it would be emailed to the System Administrator who created the schedule, who can see everyone.
Step-by-step Guide
To create the report:
-
Go to Site Administration > Reports > Report Builder > Custom reports.
-
Click on the "New Report" button.
-
Enter a name for the report, and select the source (generally, "Course participants" or "Course completions" - see the notes below for the difference between the two.)
-
Click on the "Save" button.
-
Add the columns the instructor needs, such as the user's name, email, and the learning record information for the course.
-
Add the "Select course" condition and choose the course. You can select more than one course in this condition. Without this condition, the report lists the users of every course on the site.
To email the report to the instructor:
-
In the report, click on the "Schedule" tab.
-
Click on the "New Schedule" button.
-
Enter a name for the schedule and select the format of the file (for example, Comma separated values (.csv)).
-
Set the date and time the schedule starts from, and the recurrence.
-
Set "View report data as" to "Schedule creator". The other options, "Schedule recipient" and "Select user", change whose view of the data is used.
-
In the Audience section, select the instructor (or instructors) who should receive the report. For example, choose "Manually added users" and select them.
-
Click on the "Save" button at the bottom of the page.
See Scheduling Reports for the frequency, file format and recipient options.
Important Notes
-
The instructor receives the report by email as a file. It is not a report the instructor can open in the learning environment using a browser.
-
The instructor receives everything the report contains as the schedule creator sees it, including each user's name and any other column that was added. Add only the columns the instructor needs.
-
The "Course participants" source shows only the most recent learning record for each user. If the instructor needs every historical completion, such as users who completed the course several times, use the "Course completions" source instead. See Managing Custom Reports for the differences between sources.
-
The report does not update itself if the instructor of the course shown in the report changes. You must manually change the audience of the schedule when instructors change.
-
On large sites, running large custom reports can affect performance. See Adding Custom Reports.
-
Only System Administrators can create custom reports and schedule them. Instructors cannot create a custom report or schedule one for themselves.