The upload users tool allows a System Administrator to perform multiple tasks at once, including but not limited to:
-
Adding users
-
Modifying users
-
Suspending or deleting users
-
Renaming users
-
Resetting users' password
-
Enrolling users in courses or programs
-
Adding users to cohorts, which can represent groups, departments, institutions or other logical groupings
-
Specifying the preferred theme for users (multi-site only)
Step-by-step Guide
To upload users:
-
Create a CSV (see Creating a CSV File for User Uploads for more details)
-
Go to Site administration > Users > Accounts > User uploads > Upload users now
-
Add the CSV file to the "File" area
-
Click on the "Upload users" button
-
Follow the instructions
Note that if you are uploading users on a regular basis, you should consider Scheduling User Uploads instead of manually uploading your users. The scheduled user uploads automates the process for you.
Below are some tips and additional details depending on what you are trying to accomplish with the "Upload users" tool
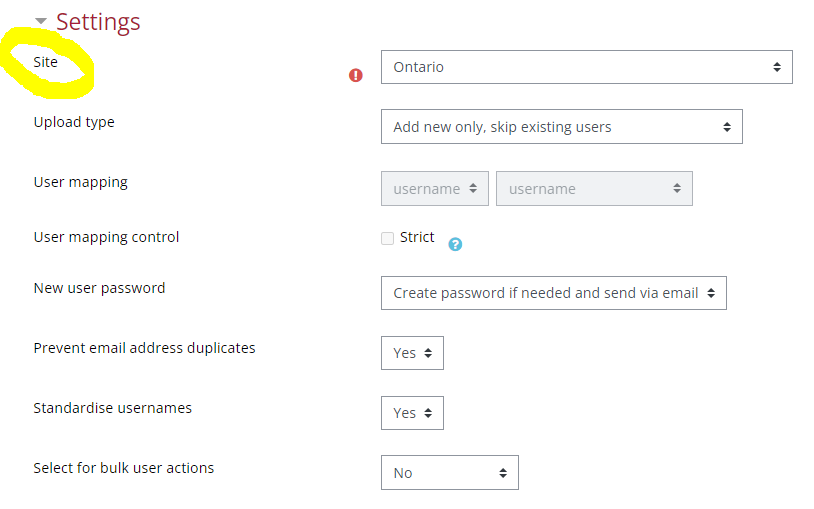
Selecting a Site (for Multi-Site Systems Only)
If your learning environment is configured as a multi-site system, you will be prompted to select a site. This is a security and error prevention measures to ensure that an administrator, and in particular a Site Administrator, cannot change the information for users not in their site.
When updating users, the site selection is recursive. In other words, if you have a site structure as per the following (see below) and select "Ontario" for the "Site" setting, any user in "Ontario", "Hospital A" and "Hospital B" will be updated as per the information in your CSV file. Users in "Quebec" or elsewhere in Canada would not be updated.
-
Canada
-
Canada > Ontario
-
Canada > Ontario > Hospital A
-
Canada > Ontario > Hospital B
-
-
Canada > Quebec
-
Updating Existing Accounts
By default, your learning environment adds new user accounts and skips existing users lines where the username matches an existing account. Set "Upload Type" to "Add new and update existing users" if you want to update existing user accounts.
-
Add all, append number to usernames if needed
-
Add new and update existing users
-
Update existing users only
Warning: errors updating existing accounts can affect your users badly. Be careful when using the options to update.
Additional Options
There are also fields settings to force password change, allow renames, allow deletes, prevent e-mail address duplicates, standardize usernames, and select for bulk operations (new users. updated users, all users).
The "standardize usernames" option folds usernames to lowercase and strips out illegal characters. This is roughly equivalent to:
$username = preg_replace('/[^-\.@_a-z0-9]/', , $username);
Set Default User Values
You may be able to set default user field values, if the fields were not included in the uploaded file on this page.
Upload user results
After accepting the preview settings by clicking on "Upload users", you should see an "Upload users" results screen. This screen will show you any exceptions or changes that were made to each user in the upload process. For example if you were updating user information, the updated information will be shown. Or if a user was not added that record will be highlighted.
The screen will summarize how many users were uploaded or updated, indicate the number of weak passwords and the number of errors.
Advanced Capabilities
The following codes will be processed by the upload tool when included as default values:
-
%l - will be replaced by the lastname
-
%f - will be replaced by the firstname
-
%u - will be replaced by the username
-
%% - will be replaced by the %
The following modifiers are allowed between the percent sign (%) and any code letter (l, f or u) :
-
(-) minus sign - the information specified by the code letter will be converted to lowercase
-
(+) plus sign - the information specified by the code letter will be converted to UPPERCASE
-
(~) tilde sign - the information specified by the code letter will be converted to Title Case
-
a decimal number - the information specified by the code letter will be truncated to that many characters
For example, if the firstname is John and the lastname is Doe, the following values will be obtained with the specified codes:
-
%l%f = DoeJohn
-
%l%1f = DoeJ
-
%-l%+f = doeJOHN
-
%-f_%-l = john_doe
-
http://www.example.com/~%u/ results in http://www.example.com/~jdoe/ (if the username is jdoe or %-1f%-l)
Code processing is done only on default values, and not on the values retrieved from the CSV file.
In order to create correct usernames, the username is always converted to lowercase. Moreover, if the "Allow extended characters in usernames" option in the Site policies page is off, characters different to letters, digits, dash (-) and dot (.) are removed. For example if the firstname is John Jr. and the lastname is Doe, the username %-f_%-l will produce john jr._doe when "Allow extended characters in usernames" is on, and johnjr.doe when off. (By default, "Allow extended characters in usernames" is always off.)
When the "New username duplicate handling" setting is set to "Append counter", an auto-increment counter will be appended to duplicate usernames produced by the template. For example, if the CSV file contains the users named John Doe, Jane Doe and Jenny Doe without explicit usernames, the default username is %-1f%-l and New username duplicate handling is set to Append counter, then the usernames produced will be jdoe, jdoe2 and jdoe3.
User Mapping & "Strict" Control
You can specify a "key" other than username when updating users by using the "Match on" setting. This is useful:
-
If your HRIS does not track the user's username, which is typically only in Active Directory
-
If a username changes as someone's marital status changes, which could result in the system creating a new account instead of updating the existing account because it couldn't find the username in the CSV file.
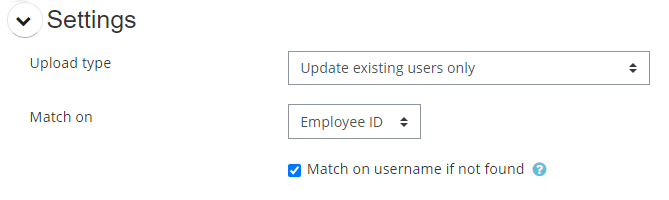
You could for example use this feature to update users by using their Employee ID as demonstrated in the screenshot below. The "key" must be unique across the system (for single-site systems ) and unique within a site (for multi-site systems). If more than 1 key is found during the upload, the system will report an error.
If you enable the "Match on username if not found" option, the system will first attempt to match the users by Employee ID and if it doesn't find a match, it'll then make a second attempt and try to match the skipped users by mapping the username in the CSV to the username in the database. If the "Match on username if not found" option is disabled, if the system can't find a match on the Employee ID, it'll simply skip updating the user(s) in question.
Related Articles